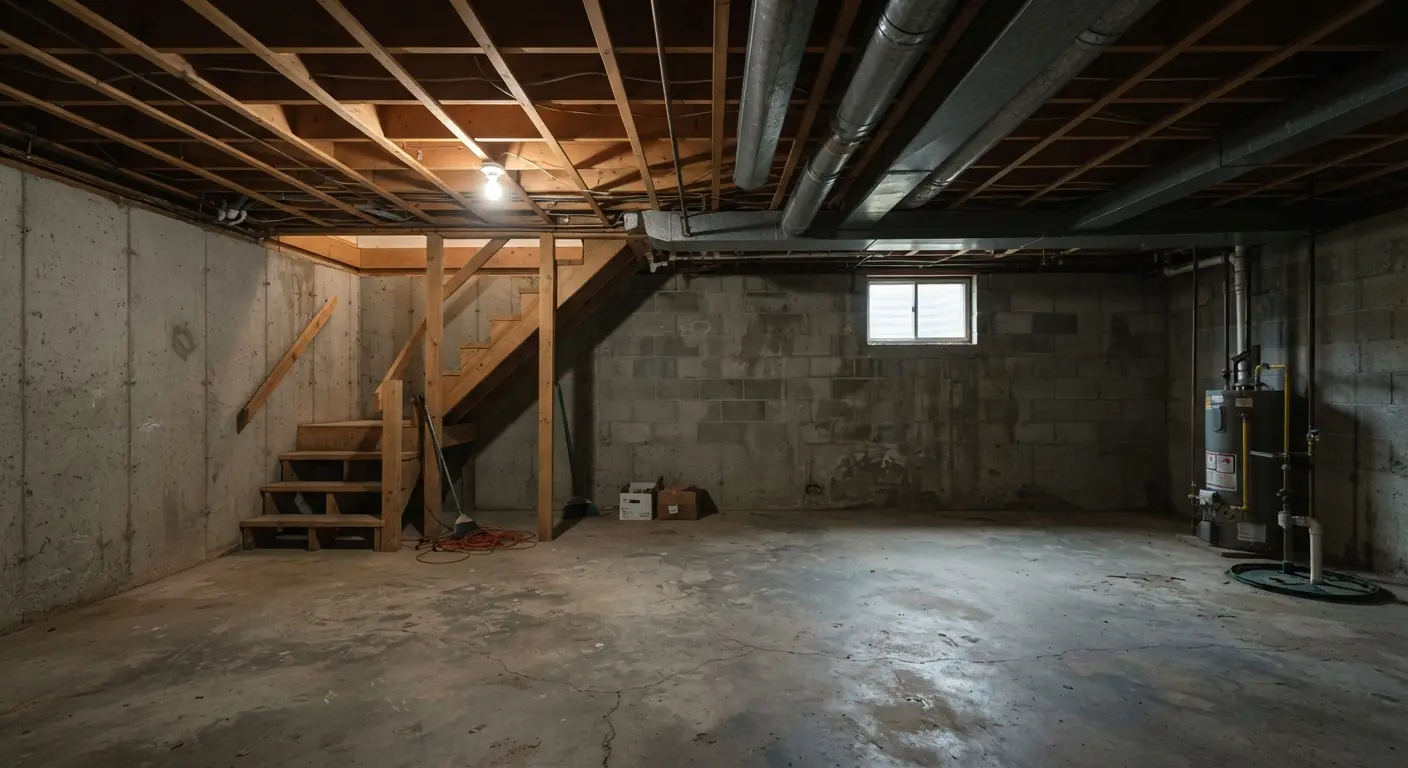
Yes, soundproofing a basement ceiling works, and it pays off most while the ceiling is still open. Seal the gaps in the subfloor above. Fill the joist bays with insulation. Hang the drywall on isolation clips and hat channel, then add a second layer with damping compound between the two.12 Voices and TV sound drop the most. Footsteps still come through as dull thumps.2
TL;DR
- Do the work before the ceiling is finished. A finished drywall ceiling has to come down before anything useful goes in.1
- Our ranking by payoff: seal and insulate the joist bays first, decouple with clips and hat channel second, and double the drywall with damping compound third. Each step leans on the one before it.
- Isolation clips handle bass better than resilient channel, and they carry two layers of drywall with fewer worries.2
- Footstep thumps are the hardest noise to stop from below. The strongest fix for them goes on the floor above.2
- A plain drywall ceiling runs $2 to $4 per square foot installed in one national cost guide.3 The clips, channel and compound are priced at your estimate.
Is it worth soundproofing a basement ceiling?
Yes, if the noise bothers you now or the basement will hold a bedroom, office, theater or rental. The work is simple while the joists are still exposed. A finished ceiling has to come down first, which adds demolition and a new ceiling to the bill. A good assembly greatly reduces sound in both directions.1
Family Handyman's builder puts it plainly. If you have a serious noise problem, it's worth the trouble of doing it right.1
The deciding question is timing. Soundproofing fits neatly into finishing a bare basement, because the ceiling is open anyway.1 Adding it later means tearing out a painted ceiling and paying for a new one. HomeGuide puts a drywall ceiling alone at $2 to $4 per square foot installed.3 If you're remodeling a basement that's already finished, fold the ceiling into that job so you only open it once.
Set your expectations before you spend. One poster on the Fine Homebuilding forum calls "proofing" a stretch and says "reduction" is closer to the truth.2 A contractor in the same thread converts basements into rental units with insulated joist bays, isolation clips, steel furring channel and two layers of drywall with acoustic glue between. He reports that everyone ends up happy. He also says you can't eliminate all the noise, only cut it down to thumps.2
Why does noise pass through a basement ceiling so easily?
Noise passes through because the floor above and the ceiling below are both fastened to the same joists. Sound and vibration travel straight through the wood. The joist bays are usually empty, and cracks between subfloor sheets let airborne sound leak through. Ducts add one more path around the whole ceiling.12
Two kinds of noise travel through a floor. Airborne noise is voices, TV and music. Impact noise is footsteps, dropped toys and chairs dragged across the floor. Lab ratings for floor-ceiling assemblies measure them separately. STC (sound transmission class) rates airborne sound. IIC (impact insulation class) rates impact sound. A higher number is better on both, and the rating belongs to the whole tested assembly. No single product carries it alone.
Each method attacks one part of that path:
- Mass. Dense drywall blocks sound. Family Handyman recommends 5/8-inch fire code drywall over the regular 1/2-inch board.1
- Absorption. Fiberglass or mineral wool in the joist bays soaks up sound in the cavity. Those bays are usually empty because there's no heating reason to insulate them.1
- Decoupling. Clips and hat channel hold the ceiling away from the joists, so vibration has a harder time crossing.1
- Damping and sealing. A rubbery compound such as Green Glue absorbs sound and seals the cracks that leak it.1
What is the best way to soundproof a basement ceiling?
The best way combines all four jobs in one assembly. Seal the subfloor cracks and fill the joist bays with insulation. Mount the ceiling on isolation clips with hat channel. Finish with two layers of 5/8-inch drywall and damping compound between them. Each layer does a job the others can't.12
The table ranks each method by what it fixes against what it takes to get it. The ranking is our editorial judgment from the sources cited. Published STC and IIC numbers depend on the exact tested assembly, so ask your contractor for the rating of the assembly they plan to build.
| Rank | Method | What it fixes | Ceiling must be open? | Cost | Realistic result |
|---|---|---|---|---|---|
| 1 | Seal subfloor cracks and fill joist bays with fiberglass or mineral wool | Airborne sound leaking through gaps and ringing in empty bays | Yes | Priced at your estimate | The base layer every other step needs. Standard fiberglass is enough.2 |
| 2 | Isolation clips with hat channel (resilient channel is the lighter option) | Vibration passing from the joists into the ceiling | Yes | Priced at your estimate | Clips handle bass much better than resilient channel.2 |
| 3 | Second layer of 5/8-inch drywall with damping compound between layers | Too little mass and damping in a single sheet | Works best over clips | $2 to $4 per sq ft for a drywall ceiling installed3 | The rubbery compound between the sheets absorbs sound.12 |
| 4 | Treat the floor above | Footsteps at the source | No, the work happens upstairs | Priced at your estimate | The strongest fix for thumps, and the hardest to arrange.2 |
| 5 | Close flanking paths such as ductwork | Sound going around the new ceiling | Depends on the duct run | HVAC rerouting $75 to $150 per hour3 | Easy to miss. A leaky duct run carries noise around the new ceiling.2 |
1. Seal the gaps and fill the joist bays
Start by sealing every crack between subfloor sheets with Green Glue from a caulking gun.1 Then fill each joist bay with fiberglass or mineral wool cut to fit snugly. Family Handyman's builder holds the batts in place with 1-1/2-inch wood cleats screwed to the joist faces.1 One Fine Homebuilding contributor recommends standard R19 fiberglass. In his view, specialty insulations add no advantage in this spot.2
Insulation alone won't fix a noisy ceiling. It earns its place because it makes the clips and drywall work better.
2. Decouple the ceiling with clips and hat channel
Screw sound isolation clips to the joists, snap hat channel into the clips, and hang the drywall on the channel. The drywall screws go into the channel only and never touch the joists.1 Family Handyman spaces the channel 16 inches on center, running across the joists.1
Resilient channel is the older, simpler option. One Fine Homebuilding contributor calls it "a bit problematic" and has reservations about hanging more than one layer of drywall on it. He says the clip system helps with low frequencies (bass) much better.2 He also warns that furring channel used without clips helps, but it isn't true decoupling.2
3. Double the drywall and damp it
Hang the first layer of 5/8-inch fire code drywall on the channel. Seal its seams with Green Glue. Then screw a second layer through the first into the channel, with the seams offset so they don't line up.1 The rubbery compound between the layers absorbs sound that would otherwise pass straight through two stiff sheets.12
Family Handyman's builder goes further with four layers. He fastens two layers of drywall strips inside each joist bay, then hangs two more layers on the clips below.1 A Fine Homebuilding contributor gives the same advice in different words: add mass and damping to the underside of the subfloor from below while the ceiling is open.2
4. Treat the floor above
Footsteps start on the floor upstairs, so a fix there stops them at the source. One contractor on the Fine Homebuilding forum suggests laying rubber sound deadening under the carpet upstairs. Another poster calls a 1.5-inch pour of gypcrete (a gypsum floor topping) upstairs the best solution.2 A third notes that installing new floors is rarely an option.2 Rubber underlay is most realistic when the upstairs carpet is due for replacement anyway.
5. Close the flanking paths
Ductwork is a hollow path that can carry noise around your new ceiling, even low conversation.2 A Fine Homebuilding contributor calls ducts "a huge opportunity for sound to flank".2 Ask your contractor how the ceiling will meet each duct run and whether any ducts need lining or rerouting.
How much does it cost to soundproof a basement ceiling?
Expect to price it in pieces. A drywall ceiling costs $2 to $4 per square foot installed.3 Replacing an old drop ceiling with drywall costs $3 to $11 per square foot.3 The isolation clips, hat channel, damping compound and second layer are priced at your estimate, because they change with the assembly.
The figures below come from HomeGuide's national cost guide, published October 2023. Your metro will differ.
| Line item | Cost | Scope | Source |
|---|---|---|---|
| Drywall ceiling installed | $2 to $4 per sq ft3 | New drywall ceiling installed | HomeGuide |
| Replace a drop ceiling with drywall | $3 to $11 per sq ft3 | Removal plus a new drywall ceiling | HomeGuide |
| Remove an old drop ceiling | $1 to $7 per sq ft3 | Removal only | HomeGuide |
| Drop ceiling installed | $4 to $20 per sq ft3 | Grid, tiles and labor | HomeGuide |
| Insulation panels behind drop ceiling tiles | $1.50 to $2.50 per sq ft3 | Materials only | HomeGuide |
| HVAC technician to reroute ductwork | $75 to $150 per hour3 | Labor | HomeGuide |
| Isolation clips, hat channel, damping compound, second drywall layer | Priced at your estimate | Varies by assembly | Your contractor's quote |
Here is what those rates mean for a 500-square-foot basement ceiling, worked from the HomeGuide figures:
- One drywall ceiling layer installed: 500 × $2 to 500 × $4, which works out to $1,000 to $2,000.3
- Insulation panels behind a drop ceiling, materials only: 500 × $1.50 to 500 × $2.50, which works out to $750 to $1,250.3
- A drop ceiling of 500 square feet: $2,000 to $10,000, straight from HomeGuide's own table.3
For scale, the same guide puts finishing a basement at $32 to $47 per square foot.3 The ceiling is one line inside that budget. Soundproofing adds to that line, and it adds least when the ceiling is going up anyway.
How can you soundproof a basement ceiling without drywall?
You can get partway with a drop ceiling and insulation panels behind the tiles. HomeGuide says those panels reduce sound transfer.3 Fill the joist bays above the grid with insulation as well. Expect less than a clipped double-drywall ceiling, because light tiles in a grid add far less mass than two layers of 5/8-inch drywall.
Acoustic ceiling tiles mostly work on the room below. HomeGuide credits mineral fiber tiles with sound absorption for reduced echo and reverberation. It lists them at $1.00 to $3.50 per square foot for materials.3 Less echo makes the basement itself sound quieter. It does much less for noise traveling up to the rooms above.
Moisture matters in a basement. Mineral fiber tiles are prone to discoloration in humid areas. Plastic PVC and vinyl tiles resist moisture, mold and mildew, at $2.00 to $9.00 per square foot for materials.3 A drop ceiling also needs at least 3 inches of clearance for its framework.3 Check that against the ceiling height rule in the code section below.
The payoff of a drop ceiling is access. You can lift a tile to reach wiring and water lines.3 If access matters more to you than maximum quiet, that tradeoff can be worth it. Our comparison of basement ceiling options weighs access against headroom and budget.
What is the most affordable way to soundproof a basement ceiling?
The cheapest useful step is sealing subfloor cracks and filling the joist bays with standard fiberglass while the ceiling is open. It makes every later step work better. One Fine Homebuilding contributor says specialty insulations provide no advantage over standard R19 fiberglass in this spot.12
The next saving is on the drywall itself. Factory-damped acoustic drywall is layers of standard board and damping compound.2 One contractor on that 2010 forum thread quoted it at $100 per sheet in his area.2 Another contributor says you can usually build a heavier, better damped and cheaper panel on site from standard drywall and damping compound. Building it on site also lets you offset the seams between layers.2
Spend on the parts that stop sound crossing the floor. Acoustic tiles cut echo in the basement.3 Most of the upstairs noise still comes through them.
How do you reduce noise coming from the basement into the upper floor?
The same ceiling assembly works in both directions. It greatly reduces basement noise heard upstairs as well as upstairs noise heard below.1 For noise going up, pay extra attention to ducts and to the loudest source in the basement, such as a TV or sound system.
Family Handyman gives the classic example: a big game on the basement TV while someone tries to sleep on the first floor.1 Speakers push both airborne sound and bass vibration into the structure. Clips help most with that low end.2
If you're planning a basement home theater, build the soundproof ceiling into the plan from day one, alongside the layout in our home theater design guide. Ask where each speaker goes. Make sure no ceiling speaker or light fixture bridges your clipped ceiling to the joists.
Check the ducts too. A shared duct run can carry sound from the basement to the rooms upstairs.2
Does a soundproof ceiling change the code rules?
It can, in two ways. Extra layers lower the ceiling, and the 2021 International Residential Code sets a 7-foot minimum for habitable basement space. A basement unit that makes the house a two-family dwelling needs a fire-rated floor between units. Local adoption and amendments vary.4
Ceiling height. Section R305.1 of the 2021 IRC requires a ceiling height of at least 7 feet in habitable space, hallways and the parts of basements that contain them.4 Beams, girders and ducts in basements with habitable space may project to within 6 feet 4 inches of the finished floor.4 Family Handyman says its four-layer method only lowers the ceiling by 5/8 inch, because two layers sit inside the joist bays.1 That figure counts the drywall only. Clips and channel hang the ceiling a little lower, so have your contractor measure the finished height before work starts.
Fire separation. Under section R302.3, dwelling units in two-family dwellings must be separated by floor assemblies with at least a 1-hour fire-resistance rating. A 1/2-hour rating is allowed where the building has an automatic sprinkler system throughout.4 A contractor on the Fine Homebuilding forum says his rental conversions with this kind of ceiling satisfy his fire marshal's 30-minute rating.2 Your local code decides what applies. If you're planning a basement apartment or in-law suite, your contractor pulls the permit and books the inspections.
What should a good soundproofing quote show?
A good quote names the exact assembly and every layer in it. It lists the clip and channel type, the drywall thickness and number of layers, the damping compound and the insulation. It also says how ducts and light fixtures will be handled and what finished ceiling height to expect.12
Ask your contractor these questions before you sign:
- Are you using isolation clips with hat channel, or resilient channel alone?
- How many layers of drywall, what thickness, and is there damping compound between them?
- Will you seal the subfloor cracks and the drywall seams?
- What insulation goes in the joist bays?
- How will you handle each duct run and ceiling light?
- What will the finished ceiling height be at the lowest point?
- Is there a published STC and IIC rating for this assembly, and does your build match the tested one?
When you're ready to price it, get a written quote for your basement ceiling. Basement Remodeling Co. passes your request to one vetted, licensed basement contractor for your metro. That contractor contacts you and books a free on-site estimate, and you get a written, itemized quote. Nothing starts until you sign. You can also find the contractor who covers your ZIP code, or read about finishing a basement in Denver and finishing a basement in Atlanta.