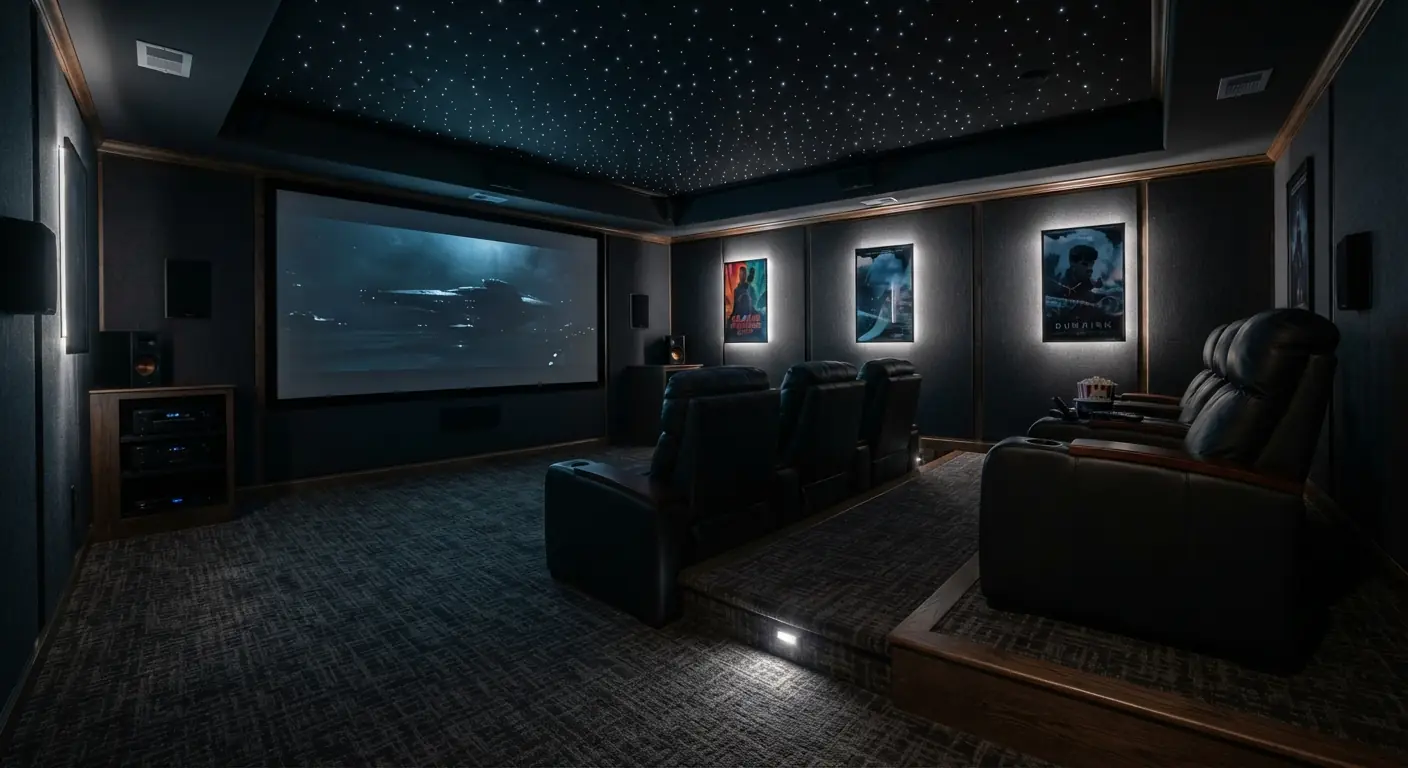
Plan a basement home theater from the main seat outward. Measure where your front row will sit, then pick the screen size that fills enough of your view. Size the riser so the back row sees over the front row. Settle ceiling isolation, speaker wire and quiet air before drywall goes up. A basic setup runs $2,000 to $5,000, and a high-end room can top $42,000.1
TL;DR
- Size the screen to the seats. At the 40 degree field of view RTINGS suggests for movies, an 85-inch screen sits about 8'6" from the main row.2
- Two rows need a riser. Recliners need at least 6 feet of riser depth, and a 12-inch riser works when the image starts 34 to 36 inches up.3
- Acoustic panels fix echo inside the room. Keeping sound out of the bedrooms above takes a heavier, sealed ceiling that is planned before framing.4
- Pre-wire speakers, brackets, circuits and projector feeds while the framing is open. Cutting drywall later costs more and leaks sound.5
- Budget from an independent guide. HomeGuide puts an average theater at $10,000 to $20,000, and finishing a bare basement is extra.1
How big should the screen be for your seating distance?
Pick the screen size from the distance between the screen and your main row. SMPTE recommends a screen that fills at least 30 degrees of your view, and RTINGS suggests 40 degrees for a cinema feel. At 40 degrees, a 65-inch screen suits a seat about 6'6" away and a 110-inch screen about 11'0".2
Use this table to match your room. The distances come from RTINGS' size-to-distance chart, which is built on field of view.2
| Screen size | Mixed use (30°) | Cinema (40°) | Most immersive (62°) |
|---|---|---|---|
| 65" | 8'10" | 6'6" | 3'11"2 |
| 75" | 10'2" | 7'6" | 4'7"2 |
| 85" | 11'6" | 8'6" | 5'2"2 |
| 98" | 13'3" | 9'9" | 5'11"2 |
| 110" | 14'11" | 11'0" | 6'8"2 |
| 115" | 15'7" | 11'6" | 6'11"2 |
Read it both ways. If your seats are fixed, find the distance and read across to the size. If you already want a size, the table tells you where the seats go.
The range is wider than most people expect. RTINGS notes that a couch 7 feet away could work with anything from a 50-inch to a 115-inch screen, depending on how immersive you want it.2 The 62 degree column is the ceiling. SMPTE treats it as the maximum field of view, so sitting closer than that means turning your head to follow the action.2
Past about 85 inches, look at a projector.5 Crutchfield says a room with space for a screen bigger than 85 inches should at least consider one, though 98-inch TVs do exist.5 A projector adds two planning items: throw distance and brightness.5 If you stay with a TV, a dark basement suits an OLED, which Crutchfield recommends for its cinema-like black levels.5
Use the biggest wall you can. In Crutchfield's basement project, moving the screen from a small wall to the larger back wall made room for a 120-inch screen and a wider soundstage.5 Before you commit, mark the screen outline on the wall with painter's tape and sit in every seat.2
How do you plan risers and rows?
Plan rows in three steps. Set the front row distance to suit the screen size, give the back row a riser deep enough for its seats, then set the riser height and screen height together. Audio Advice puts risers for reclining seats at 6 feet deep at minimum, with 6'6" or 7' better, and 5 feet for seats that don't recline.3
Any room with more than one row needs a riser, or the heads in the front row block the view from the back.3 Depth matters because recliners take up floor when they open. Build it too shallow and guests climb out of their seats every time someone walks past for popcorn.3
Set the screen height and riser height together
For a large projection screen, Audio Advice finds the bottom of the image works best 30 to 36 inches above the main viewing platform.3 Measure to the bottom edge of the picture itself, since the frame sits a little lower. Images of 133 inches and up should start lower still.3
The riser height follows from that:
- With the image bottom at 34 to 36 inches, build a riser 12 inches or taller.3
- With only an 8-inch riser, the screen material needs to start at least 38 inches up.3
- With a tall ceiling, a 15-inch riser gives a stadium feel with steps of 7½ inches.3
To check your own plan, draw a side view on graph paper. Put the two chairs at their planned spacing, draw the screen, and run a line from the top of the back chair to the bottom of the screen. Raising the riser or the screen gives that line more clearance over the front row.3
A worked example
Say you want a 110-inch screen and two rows of recliners. Here is how the RTINGS distances and the Audio Advice riser depths fit together. The sums are ours, based on those two sources.23
- Put the front row 8'6" from the screen. That sits between the 62 degree limit of 6'8" and the 40 degree cinema distance of 11'0".2
- Build a 6'6" deep riser behind it.3 By our arithmetic (8'6" plus 6'6"), the back row lands about 15 feet from the screen.
- Check the back row. The 30 degree mixed-use distance for 110 inches is 14'11", so the back row sits right at the minimum field of view SMPTE recommends.2
- Add the depth your screen wall and front speakers need, plus a walkway behind the back row. That total is your minimum room length.
Headroom is the catch in many basements. By simple subtraction, a 12-inch riser under an 8-foot ceiling leaves 7 feet above the back row, and ducts or beams can take more. Local codes set minimum ceiling heights for finished rooms and adoption varies, so have your contractor measure before you choose a riser height. If a riser won't fit, Audio Advice suggests one row of seats with a bar and bar stools behind it.3
What is the best home theater system for a basement?
For most basement theaters, the best system is a 5.1 or 5.1.2 speaker layout run by an AV receiver. HomeGuide says 5.1 is enough for most families and 7.1 is for much larger spaces.1 Crutchfield's basement build used 5.1.2 Dolby Atmos: five speakers at listening level, one subwoofer and two overhead.5
| System | What it is | Best for |
|---|---|---|
| Sound bar | One bar, some with wireless surrounds and a wireless sub | Small rooms or rooms you can't wire |
| 3.1 | Left, center and right speakers plus a powered sub | Rooms where surround speakers won't look or sound right |
| 5.1 | 6 channels: five speakers and a sub1 | Most basement theaters |
| 7.1 | 8 channels: adds rear speakers behind the seats16 | Much larger rooms |
| 5.1.2 or 5.1.4 | 5.1 plus two or four overhead speakers | Rooms with an open ceiling to wire |
Sources for the table: HomeGuide for channel counts and room fit, Crutchfield for the other layouts.156
Basements suit the bigger layouts. They are often the last rooms in a house to be finished, so wires and in-ceiling speakers go in without ripping out drywall.5 The receiver can hide in a closet. In Crutchfield's project it sits in a utility closet, and the designer chose a 9-channel receiver for a 5.1.2 room so speakers could be added later.5 Spare channels only help if the wire is already in the wall, which is one more reason to pre-wire generously.
Placement matters as much as the speakers. Crutchfield's placement guide gives these starting points:6
- Space the front left and right speakers about as far apart as they are from you.
- Keep the tweeters at the height of your ears when seated.
- Put the center speaker right above or below the screen, lined up with its midpoint. Crutchfield's designer says about 60% of soundtrack dialogue comes from it.5
- In a 5.1 room, put the surrounds to the left and right of the main seat.
- For 5.1.2, set the ceiling pair slightly in front of the main seat, as wide apart as the front speakers. For 5.1.4, add a second pair a few feet behind you.6
- A subwoofer near a wall gives more bass, and a corner gives even more. Two subs fill in weak spots in the bass.
One basement catch: the overhead speakers go into a ceiling that is also the floor of the room above. Each cutout is a path for sound, so plan them with the isolation work below.
How do you make a basement theater sound right inside the room?
Control reflections, then calibrate. Hard floors and bare walls bounce sound and muddy dialogue, so lay a thick rug between the seats and the screen and put absorbing panels at the main reflection points. Then run the receiver's room calibration, which sets timing, level and EQ for each speaker.546
Panels can be acoustic foam or fabric.4 Quilts, tapestries and a bookshelf full of books absorb sound too.5 To find a reflection point, sit in the main seat while someone slides a mirror along the side wall. Wherever you can see a front speaker in the mirror, sound is bouncing off that spot toward you.
Calibration comes last, after the speakers and furniture are in their final spots. The receiver's microphone listens to test tones from each speaker and adjusts for the room.6 Move a speaker later and you need to run it again.
Watch the materials in a basement. Carpet, fabric panels and ceiling tiles are porous, and EPA notes that porous materials may have to be thrown away if they get moldy.7 Keep them on dry surfaces in a room with its moisture under control.
How do you keep theater sound out of the rooms above?
Basement Remodeling Co.'s planning rule is to decide how quiet the rooms above must be before framing starts. Isolation is built into the ceiling layers, and adding it later means tearing the ceiling out. Acoustic panels tame echo inside the room. Keeping sound in takes mass and airtight seams, and Valerion suggests starting with mass-loaded vinyl or specialty drywall.4
A basement starts with an advantage. Its walls sit against earth, and Crutchfield notes that inert earth is a great sound insulator.5 That leaves the ceiling, the stair door, the ductwork and every hole you cut as the weak paths.
A sound-isolating basement ceiling usually combines four things:
- Mass. Heavier layers such as extra drywall or mass-loaded vinyl.4
- Separation. Drywall mounted so it doesn't touch the joists directly, so vibration can't travel straight up the framing.
- Filled cavities. Insulation in the joist bays.
- Sealed gaps. Sealed edges and sealed cutouts for lights, speakers and pipes. Sound leaks through any air gap.
Add a solid door with seals where the theater meets the rest of the house. Bass is the hardest sound to stop, so the subwoofer is the real test.
There are tradeoffs. Every in-ceiling speaker and recessed light is a hole in that ceiling, so ask your contractor how each cutout will be backed and sealed. A drop ceiling keeps pipes and wires easy to reach, but its tiles add little isolation. It suits rooms with nobody sleeping above.
HomeGuide puts soundproofing at $10 to $30 per square foot.1 It doesn't say whether that means floor area or treated surface, so ask for the ceiling and walls priced as separate lines. Tell your contractor who sleeps above the theater and when. That answer decides how far the isolation needs to go.
What should you pre-wire before the drywall goes up?
Pre-wire everything the theater will need while the framing is open. That means speaker wire to each planned speaker, HDMI and power at the TV or projector spot, circuits for the equipment, and lighting controls. In Crutchfield's basement project, the contractor ran in-wall speaker wire with extra length at each end and set speaker brackets before drywall.5
Those brackets meant the installer knew exactly where and what size to cut after the drywall went up.5 Use this list as your pre-wire walk-through:
- Speakers. Run wire to every location, including overhead pairs you might add later.
- Subwoofers. Most people put the sub at the front of the room so it's easy to connect. If the best spot is elsewhere, a wireless kit works wherever there's an outlet.6 A second wired sub location costs little now.
- Screen and projector. You need an HDMI cable from the TV or projector to the sound system.5 Ask for a conduit to the projector spot so a new cable can be pulled later without opening the ceiling.
- Equipment closet. Plan power, network and airflow for the receiver and players.
- Lighting. Plan dimmable sconces or baseboard rope lights that keep light off the screen.4 HomeGuide puts recessed lighting at $125 to $300 per can light.1
- Circuits. HomeGuide puts theater electrical work at about $700 to $2,000.1 A dedicated circuit runs $250 to $900 and can help prevent problems with your electrical panel.1
Have a licensed electrician add any new circuits. Your contractor pulls the permit and books the inspections. Take photos of every open wall before drywall so you know where the wires run.
How do you keep the room comfortable, quiet and dry?
Plan heating, cooling and dehumidifying for a closed room full of people and electronics, and keep the airflow quiet. Valerion notes a basement theater can get stuffy or cold, which is uncomfortable and can shorten equipment life. EPA advises keeping indoor humidity below 60 percent, ideally between 30 and 50 percent.47
Air noise ruins quiet scenes. The usual culprits are air rushing through small registers, a furnace or air handler on the other side of the wall, and a running dehumidifier. Ducts also carry sound from room to room. Ask your contractor:
- Where will the supply and return air come from, and will the room still get air with the door shut?
- Does the theater share a duct run with a bedroom above?
- Where will the furnace, water heater and any dehumidifier sit relative to the seats?
- How will the equipment closet shed its heat?
For humidity, EPA says a meter from a hardware store costs about $10 to $50.7 Use air conditioning or a dehumidifier when needed, and insulate cold water pipes so condensation doesn't form.7
What are some cool basement ideas for a home theater?
The best basement theater ideas use what a basement already has, which is darkness and space. Good examples include dark walls and ceiling that soak up screen light, dimmable sconces or baseboard rope lights, a bar with stools behind the front row, a snack counter and a themed look such as 1920s art deco.438
Go dark on purpose
Most basements have earth on three or four sides, so they are naturally dark and any windows are easier to cover.5 Paint the walls and ceiling a dark, non-reflective color such as deep blue, charcoal gray or black. Those colors soak up light that spills off the screen, which improves picture and contrast.4 If your basement has windows, HomeGuide puts curtains at $20 to $200 per window.1
Light the room without lighting the screen
Rope lights along the baseboards and dimmable sconces that throw light up or down keep the screen clean.4 With a TV, a color-matching backlight behind the screen adds atmosphere.5
Seat people more than one way
A bar and stools behind a single row give you a second row without a riser.3 A sofa on a low platform behind a row of recliners is a simple two-tier layout.4 One DIY basement theater build chose a U-shaped sectional over recliners and planned a bar table behind it.8
Add a snack station
A mini-bar, a popcorn machine built into a counter and hidden cupboards for snacks keep people in their seats.4 HomeGuide puts a popcorn machine at $60 to $1,300.1
Pick a theme and commit
The same DIY build went for 1920s art deco, with dark walls, lush fabrics and metallic gold trim.8 It also planned decorative drop-in ceiling tiles.8 A drop ceiling like that looks great and keeps pipes reachable, but add isolation above it if someone sleeps upstairs.
What does a basement home theater cost?
A basement home theater costs about $2,000 to $5,000 for a basic setup, $10,000 to $20,000 for an average room and $25,000 to $42,000 or more for a high-end build, according to HomeGuide.1 Those ranges cover gear, seating and wiring, with soundproofing added from the average tier up. If the basement is bare, finishing costs extra.1
Two published tier sets are shown below. They come from different kinds of source, so they are labeled separately.14
| Tier | HomeGuide (independent cost guide) | Valerion (projector maker) | What HomeGuide includes at this tier |
|---|---|---|---|
| Basic or starter | $2,000 to $5,0001 | $2,000 to $5,0004 | Flat screen TV, basic sound bar, sofa seating, DIY wiring |
| Average or mid-range | $10,000 to $20,0001 | $5,000 to $15,0004 | Mid-range projector or larger TV, surround sound, moderate soundproofing and acoustic treatment, professional wiring |
| High-end or luxury | $25,000 to $42,000+1 | $15,000+4 | High-end projector and large screen, advanced surround, premium seating, extensive soundproofing, automation |
Budget from HomeGuide's ranges. It is an independent cost guide that breaks the total into parts, while Valerion sells projectors. Valerion's mid-range tier tops out lower at $15,000.4
HomeGuide's installed cost by part:1
| Part | Installed cost |
|---|---|
| Screen | $500 to $10,000+1 |
| Speakers | $300 to $10,000+1 |
| Seating | $500 to $20,0001 |
| Electrical wiring | $700 to $2,0001 |
The room itself is the bigger number in most basements. HomeGuide puts finishing a basement at $30 to $50 per square foot and a basement remodel at $25 to $65 per square foot.1 If yours is bare concrete, start with what finishing a bare basement involves. If it's already finished and you're converting a family room, reworking an existing basement is the closer guide. Isolation layers, risers and HVAC changes vary too much by house to budget from a national figure. Those are priced at your estimate.
What are common basement remodel mistakes to avoid in a theater?
The costly mistakes happen before any gear arrives. They include finishing over a moisture or radon problem, building a riser too shallow or too low, putting the screen on the wrong wall, skipping ceiling isolation under bedrooms, and closing walls before speaker wire is run. Each one means tearing out finished work to fix.73
Finishing over water or radon
EPA's rule is that the key to mold control is moisture control.7 A theater is full of carpet, fabric and soft seating, so fix any water problem first. Test for radon too. EPA calls radon the second leading cause of lung cancer overall.9 EPA's guidance is to fix a home at 4 pCi/L or higher and to consider fixing between 2 and 4 pCi/L.9 Use a certified radon tester or a lab kit, and have a licensed mitigation pro install any system before the walls close.
Getting the riser wrong
A riser that is too low leaves the back row looking at heads. One that is too shallow makes recliners a squeeze. Audio Advice says it often walks into finished theaters with the riser height or depth not ideal.3 Use the depths and heights above, and check the sightline on paper.
Putting the screen on the small wall
The obvious wall isn't always the right one. Crutchfield's project gained a 120-inch screen and a wider soundstage by switching walls.5
Calling panels soundproofing
Panels treat echo inside the room. They don't stop sound reaching the rooms above.4 If people sleep upstairs, isolation has to be in the ceiling plan.
Closing walls too early
Speaker wire, brackets, projector feeds and circuits are cheap with the framing open. After drywall, every change means cutting and patching.
Forgetting air and headroom
A sealed room gets stuffy, and a riser eats ceiling height. Settle the HVAC plan and measure headroom over the riser before framing.
What should a good basement theater quote show?
A good basement theater quote itemizes each part of the build so you can check it. Look for riser size and height, the ceiling isolation layers, speaker and low-voltage wire runs, new circuits, lighting, HVAC changes, moisture and radon steps, and who pulls the permit and books inspections. If a line is missing, ask about it before you sign.
Questions worth asking at the estimate:
- How will you conceal the wires?1
- Do you install soundproofing as well?1
- What is the best sound system for this room size?1
- Who installs the AV gear, you or a separate installer? In Crutchfield's project the contractor ran the wire and brackets, and the family did the final install.5
- What riser depth and height are you building, and why?
- How will ceiling cutouts be backed and sealed?
Basement Remodeling Co. sends your request to one vetted, licensed basement contractor for your metro. Nobody else receives it. The contractor contacts you and books a free on-site estimate. They measure, check moisture and ceiling height, and talk through the layout. You get a written, itemized quote, and nothing starts until you sign. Your contractor pulls the permit and books the inspections.
When your plan is ready, request a written quote for a basement home theater. Matched contractors work in four Colorado and Georgia markets: basement finishing in metro Atlanta, basement finishing in Denver, basement finishing in Colorado Springs and basement finishing in Fort Collins. You can also check whether your ZIP code is covered.