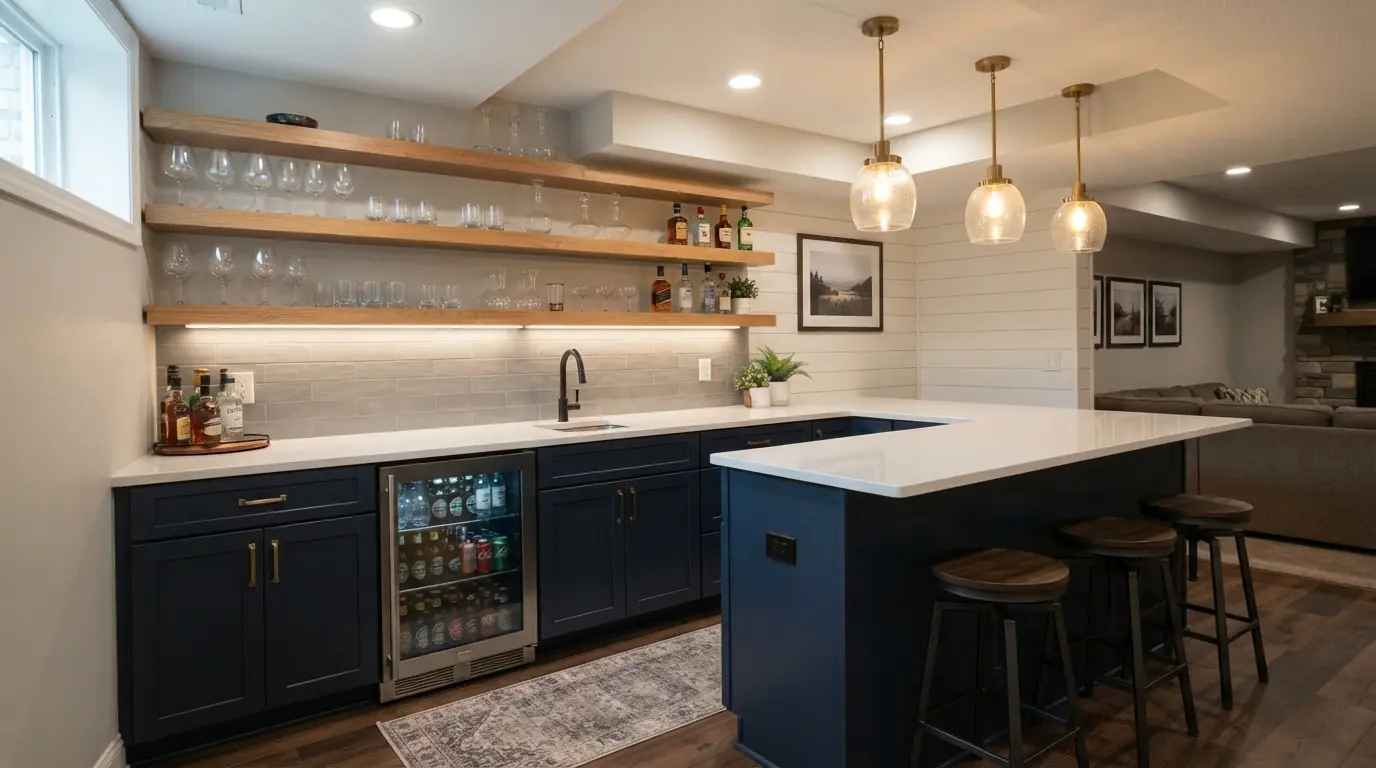
Do the carpentry yourself and hire out the water and the power. A dry bar is a fair DIY project for a handy homeowner: a knee wall anchored to the slab, stock base cabinets, a counter and a bar top. Sink lines, drains and new circuits go to licensed trades, with whatever permits your city requires. Plan those before you frame anything, because they decide where the bar can go.
TL;DR
- A dry bar is the right DIY job. Once a sink or a new circuit is involved, bring in a licensed plumber or electrician and check permits with your building department first.
- On a slab, fasten a sill plate into the concrete, keep wood that touches concrete rot-resistant, and settle any moisture problem before you build on the floor.
- The easiest build uses stock base cabinets as the bartender's work counter and a framed knee wall as the guest side, with the bar top sitting on the wall.
- Home bars typically run 6 to 8 feet long and 36 to 42 inches tall.1 Size the cabinet run to the fridge and sink you plan to fit.
- A sink raises the price. HomeGuide puts a prefab dry bar at $1,000 to $5,000 installed and a prefab wet bar at $2,000 to $12,000.1
Which parts of a basement bar can you DIY, and which need a pro?
You can handle the layout, the knee wall, the cabinets, the bar top and the trim. Hand off anything that carries water or new power. Here's how the jobs split.
| Job | Who does it | Why |
|---|---|---|
| Layout, measuring, ceiling check | You | Needs a tape and a plan, nothing more |
| Sill plates and knee wall on the slab | You | Basic framing with a powder-actuated nailer on concrete |
| Base cabinets and work counter | You | Same skills as a kitchen cabinet install |
| Bar top, aprons and trim | You | Finish carpentry, forgiving if you go slow |
| New outlets and dedicated circuits | Licensed electrician | Code work that an inspector checks |
| Sink supply and drain lines | Licensed plumber | Leaks in a basement are expensive to find late |
| Ejector pump if you're below the sewer line | Licensed plumber | Mechanical system tied into your drain |
| Moving or removing walls | Your contractor | Structural and permit questions |
Water mistakes in a basement get expensive, because a slow drip behind a cabinet can go unseen until the damage shows.
If you haven't settled on a layout yet, start with our basement bar ideas guide, then come back here to build it. If you're replacing a tired bar in a basement that's already finished, the demolition and rework fall under basement remodeling rather than a fresh build.
How do I build a DIY basement bar?
Build it in the order a carpenter would: check the spot, anchor a knee wall to the slab, set the base cabinets, then add the tops and trim. BLACK+DECKER's published corner bar plan covers the same stages. It rates the job intermediate and estimates about one day, with a table saw and a pneumatic nailer on the tool list.2
The plan uses two parts that work together. A framed L-shaped knee wall faces the guests and carries the bar top. Behind it, base cabinets with a countertop give the bartender a work surface and storage.2 That split is the simplest way to build a bar around stock cabinets.
Step 1: Pick the spot and check the ceiling
Look for a spot near existing plumbing, away from the main traffic path, with enough ceiling height. Near existing plumbing matters even for a dry bar, because it keeps a future sink cheap. HomeGuide's bathroom cost guide says new plumbing costs more when the fixture sits far from existing drain and vent lines.3
Measure the ceiling where people will stand. The 2021 International Residential Code, section R305.1, sets 7 feet as the minimum ceiling height for habitable basement space, with beams, girders and ducts allowed to project down to 6 feet 4 inches.4 Your city may have adopted a different edition or amended it, so confirm locally. Our basement ceiling height guide covers how that rule is measured.
Step 2: Anchor the sill plates to the slab
Cut 2x6 sill plates for each leg of the knee wall. The BLACK+DECKER plan uses 68-inch plates set at a right angle, and on a concrete floor it fastens them with a powder-actuated nailer.2
Step 3: Frame the knee wall and tie it to the house
Attach the end stud to the existing wall at a stud location, using panel adhesive and deck screws. If there's no stud where you need one, the plan opens the wall and adds a horizontal nailer between the nearest studs.2 Toe-nail the corner studs to the sill plates with 16d nails, check them with a level, then add cap plates the same size as the sill plates. A few 3-inch deck screws through the corner studs add strength.2
That tie into the house wall is what stops a short wall from rocking when someone leans on the bar.
Step 4: Set the base cabinets
Set the base cabinets on the bartender's side of the knee wall. The plan uses one 24-inch base cabinet and one 36-inch corner base cabinet, with a refrigerator measuring 19 inches wide, 22 inches deep and 32-3/4 inches high.2 Check your fridge's spec sheet against the cabinet opening before you fix anything in place.
Basement slabs are rarely flat. Shim the cabinets level and plumb before you screw them together, or the countertop will rock.
Step 5: Skin the front of the bar
The plan rips 1/2-inch MDF to 40 1/2 inches wide for the front panels, glues them to the studs with panel adhesive and nails them at 8- to 12-inch intervals.2 A 1/4-inch spacer under each panel leaves a gap between the panel and the floor.2 We like that gap on a basement floor. It keeps the panel's bottom edge out of a spill.
Step 6: Build the bar top
Bond a particleboard subbase to the top plates of the knee wall. The plan sets even overhangs of 6 inches in front and 4 inches on the bartender side, then laminates cherry plywood on top with panel adhesive and screws driven up through the subbase.2 Hardwood edging with a roundover finishes the edges.2
A 6-inch front lip suits a bar where people stand. If guests will sit on stools, plan more overhang.
Step 7: Add the work counter and appliances
Fix a countertop to the base cabinets to give the bartender an easy-to-clean surface, then slide in the refrigerator.2 Put an under-counter fridge or wine cooler at the end of the run, so guests can grab a drink without walking behind the bar.
How do you frame a bar on a concrete slab?
Fasten a 2x6 sill plate straight into the concrete, stand short studs on it, and tie the end of the wall into a stud in the existing wall. On concrete, the BLACK+DECKER plan uses a powder-actuated nailer where a wood floor would get nails or screws and adhesive.2 The slab adds two concerns a wood floor doesn't: moisture and movement. For full-height walls, see our basement wall framing guide.
Moisture
Concrete wicks water from the ground. Use rot-resistant, pressure-treated lumber for any plate that sits on the slab, and ask your inspector what your city requires there.
Check the slab before you build. Damp spots, white crusty deposits or a musty smell mean water is getting in. Fix that first. Building cabinets on a wet floor just hides the problem. If your basement has never been finished, our basement finishing page covers what gets checked before any framing goes down.
Movement
Some slabs rise and fall as the soil under them swells and dries. A wall fastened to both the slab and the floor joists above can get pushed up into the house when that happens. The fix is a floating wall: framing built with a gap at the top that lets the slab move without lifting the structure above it.
A bar knee wall stops at counter height and never touches the joists, so it usually sidesteps the problem. A full-height back-bar wall or a soffit that ties into the joists is different. If you're building one and your area has moving soils, ask a local contractor how walls there are framed.
What's under the slab
Before you shoot fasteners into concrete, find out what runs inside it. Some basements have in-floor heat tubing or buried lines. A powder-actuated nail through a pipe turns a weekend project into a plumbing call.
Which cabinets should you use for a basement bar?
Stock kitchen base cabinets are the backbone of most DIY bars. They give you storage, a ready frame for the work counter and a slot for an under-counter fridge. HomeGuide puts installed cabinets at $150 to $500 per linear foot and custom cabinets at $500 to $1,200 per linear foot installed.1 Installing stock cabinets yourself saves the labor share of those prices.
What to look for in a basement:
- Box material. Plywood boxes shrug off a damp day or a spill better than particleboard. The bottom panel is where water sits.
- Standard base depth. Base cabinets let you use a stock countertop and a standard under-counter fridge.
- A corner unit if the bar turns. The BLACK+DECKER plan uses a 36-inch corner base cabinet with 12-inch doors to fill the inside of its L.2
- An open bay for the fridge. Measure the appliance before you order. The plan's fridge is 22 inches deep.2
If you'd rather skip framing altogether, prefab options exist. A built-in wall cabinet dry bar costs $1,000 to $2,500 in materials, and a freestanding sit-down dry bar costs $1,500 to $5,000.1
What bar top should you use?
Laminate is the cheapest top and the easiest to install yourself. Granite and quartz cost more and usually come through a fabricator. Across materials, HomeGuide puts installed countertops at $50 to $150 per square foot.1 Budget from that range if you're paying for installation.
| Bar top | DIY fit | Notes |
|---|---|---|
| Postform laminate | Good | The BLACK+DECKER plan uses a mitered postform counter with 6-foot legs on its cabinets2 |
| Hardwood plywood over particleboard | Good | Cherry plywood on a particleboard subbase with hardwood edging2 |
| Butcher block | Good | Solid wood, so it needs the same sealed finish as a plywood top |
| Granite or quartz | Poor | Heavy and cut to template, so it's fabricator work |
A wood top needs a sealed finish. The plan finishes its hardwood trim before cutting and dabs finish on each cut end.2 Do the same with a wood bar top. Spilled drinks find every bare edge.
What are the standard heights and sizes for a basement bar?
Home bars are typically 6 to 8 feet long and 36 to 42 inches tall.1 Pick the length to fit the cabinets and appliances you want behind the bar, and the height to fit the stools you plan to use.
| Dimension | Figure | Source note |
|---|---|---|
| Overall height range | 36 to 42 inches1 | Typical home bar |
| Length | 6 to 8 feet1 | Typical home bar |
| Overhang on a standing bar | 6 inches front, 4 inches bartender side2 | BLACK+DECKER corner plan |
| Ceiling in habitable basement space | 7 feet, beams and ducts to 6 feet 4 inches4 | 2021 IRC R305.1; local adoption varies |
A 6-inch lip is a ledge for standing guests. Stool seating needs a deeper overhang so knees fit under the top. Check the stools you plan to buy before you cut the top, and leave room behind them for people to walk past.
Low ceilings change the lighting more than the bar. If yours is tight, flush-mount fixtures keep the headroom that hanging pendants would take.
Can you have a wet bar without plumbing?
No. A wet bar is defined by its sink. A dry bar has counters and cabinets but no sink.1 Without a water line and a drain, what you have is a dry bar. You can still build it so a plumber can add a sink later without tearing it apart.
The BLACK+DECKER plan is a dry bar, and its authors note the design could be modified to add running water.2 If you think you'll want a sink one day, do three things now:
- Put the bar near existing plumbing, so the drain and supply runs stay short.
- Leave a sink-base cabinet in the run, or a bay you can swap one into.
- Keep the back of that cabinet open or easy to remove, so a plumber can reach the wall.
A dry bar works well if your basement is close to the main-floor kitchen, since glasses can be rinsed upstairs. If the sink matters, check your drain height. If your basement floor sits below the sewer line, a sink drain needs a pump to lift the water up to it. That adds cost, and it's plumber's work.
Where do electrical and plumbing need a permit or a licensed trade?
Treat every new circuit, water line and drain as work for a licensed trade. Ask your building department which permits your bar needs before you start. Permit rules are set locally. Your city decides what applies, and it may have amended the model code it adopted. Never assume your project is exempt.
Electrical
Even a dry bar needs power. The BLACK+DECKER plan calls for a GFCI outlet at the bar.2 A fridge, an icemaker and a blender sharing one outlet can trip the breaker, so plan circuits before the drywall goes up. Electricians charge $50 to $130 per hour.1
Hire a licensed electrician for new circuits. Adding a plug-in fridge to an existing outlet is one thing. Running new wire from the panel is another.
Plumbing
A sink needs a supply line, a drain and a vent. That's plumber's work. HomeGuide prices plumbing at $450 to $1,800 per fixture installed and sink installation at $380 to $1,400.1 Its bathroom cost guide says you'll pay more when the new fixture sits far from existing drain and vent lines.3 Plumbers charge $45 to $150 per hour.1
What a permit can trigger
Permitted work can pull other upgrades along with it. Under the 2021 International Residential Code, section R314.2.2, when an alteration that requires a permit happens, the home must get smoke alarms located as required for new dwellings.4 That includes an alarm on each story, basements included.4 Work limited to plumbing or mechanical systems is exempt from that rule.4 Section R315.2.2 applies the same trigger to carbon monoxide alarms.4
So a permitted bar circuit could mean new alarms upstairs too. Local adoption and amendments vary, so ask when you apply.
How much does it cost to build a bar in your basement?
A basement bar costs $1,000 to $5,000 for a prefab dry bar installed, $2,000 to $12,000 for a prefab wet bar and $10,000 to $30,000 for a custom wet bar.1 Doing the carpentry yourself cuts labor. The biggest swing is the sink. By our arithmetic on HomeGuide's ranges, a wet bar works out to roughly double the price of a dry bar at the same level.
| Bar type | Installed cost |
|---|---|
| Prefab dry bar | $1,000 to $5,0001 |
| Prefab wet bar | $2,000 to $12,0001 |
| Custom dry bar | $5,000 to $15,0001 |
| Custom wet bar | $10,000 to $30,0001 |
Source: HomeGuide, not including stocking the bar.1
What a DIY build costs
A DIY build skips the labor built into the installed prices above. HomeGuide puts a DIY wet bar kit at $500 to $7,000 on average.1 Tools matter too. The BLACK+DECKER plan calls for a miter saw, a table saw and a pneumatic nailer with a compressor.2
Component costs
| Item | Installed cost (HomeGuide) |
|---|---|
| Cabinets | $150 to $500 per linear foot1 |
| Countertops | $50 to $150 per square foot1 |
| Electrical wiring | $4 to $9 per square foot1 |
| Plumbing | $450 to $1,800 per fixture1 |
| Lighting | $100 to $650 per fixture1 |
| Sink installation | $380 to $1,4001 |
| Faucet installation | $250 to $6001 |
| Refrigerator | $680 to $2,5001 |
Source: HomeGuide.1 Bar stools add $50 to $200 each.1 HomeGuide's bathroom cost guide advises setting aside 10% to 20% of the budget for hidden plumbing, wiring or foundation problems.3 The same cushion makes sense for a bar.
If the basement isn't finished yet
A bar in a bare basement usually means finishing the room around it. HomeGuide puts finishing at $30 to $50 per square foot with labor, or $15,000 to $75,000 when converting an unfinished space.1 Moisture and ceiling height move that number, so get it priced once a contractor has seen the space.
Metro prices vary. The typical full finish runs $45,000 to $80,000 in metro Atlanta and $30,000 to $90,000 in metro Denver. See basement finishing in Atlanta or basement finishing in Denver for what drives those ranges.
What should a good basement bar quote show?
A good quote is written and itemized. It splits cabinets, top, plumbing, electrical and finishes into separate lines, and it says who pulls the permit. That lets you see which parts you could take on yourself and what each trade is charging for its share.
Questions worth asking any builder, drawn from HomeGuide's checklist:1
- Does this estimate include materials, labor and cleanup?
- Will you hire subcontractors?
- What unexpected costs might come up on this kind of project?
- Will you handle the permits?
- How long will the project take?
If you'd rather hand over the whole build, you can get a written quote for a basement bar. Basement Remodeling Co. sends your request to one vetted, licensed basement contractor in your metro. You get a free on-site estimate and a written, itemized quote. The contractor checks moisture and ceiling height on that visit, and nothing starts until you sign. Your contractor pulls the permit and books the inspections. To see whether your area is covered, use the basement contractor finder.