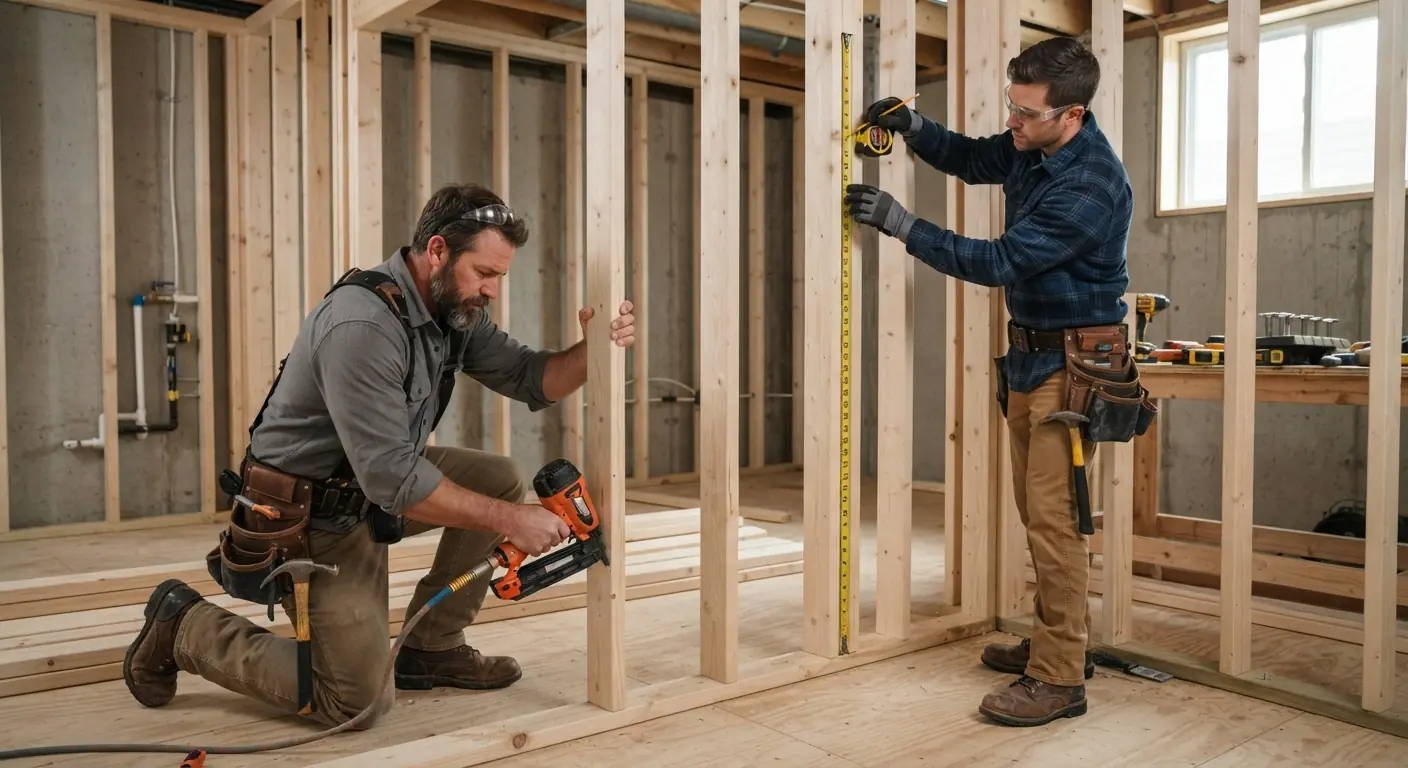
Frame basement walls in this order. Fix any water problem first. Seal and insulate the rim joist, then glue rigid foam to the concrete and tape the seams. Build a 2x4 wall with a pressure-treated bottom plate that sits about half an inch off the foam, build it short, shim it to the joists and close off the top. A 2x4 is enough in most basements once foam sits behind it. Plan on a permit.12
TL;DR
- Moisture decides the assembly. Rigid foam goes against the concrete, fully stuck down with sealed seams. Fiberglass never touches the foundation, and no plastic sheet goes on the wall.2
- Pressure-treated wood goes wherever wood touches bare concrete.1 That's the bottom plate, blocking against the foundation and wood around windows set in concrete with no foam under it. Studs and the top plate can be regular framing lumber.
- 2x4 is the default. Under the 2021 IECC, foam plus a 2x4 wall has a clear path to the basement wall minimums in metro Atlanta (zone 3A) and in Denver, Colorado Springs and Fort Collins (zone 5B). Pick 2x6 for a cavity-only R-19 route or a plumbing wall.34
- Framing is one of the cheaper parts of a finish. One national cost guide puts it at $18 to $24 per linear foot.5
- Expect a permit and inspections. Rules are local, and your contractor should pull the permit.
What do you put on basement walls before framing?
Rigid foam insulation goes on the concrete before any framing, once any moisture problem is fixed.5 The foam has to stick to the wall with no air gaps and taped or sealed seams, so room air can't reach cold concrete and condense. Seal and insulate the rim joist at the same stage.26
Fix the water first
Water ruins finished basements, and no framing detail fixes a leak. Building Science Corporation's basement digest starts with drainage: gutters, grade sloping away from the house, and a drain at the foundation perimeter.6 A masonry waterproofing coating rolled onto the wall only slows moisture that wicks through concrete. It is not a fix for water coming in.1 If you see puddles, stains or efflorescence, get that diagnosed before anyone buys lumber.
Why foam and not batts against the concrete
The classic basement wall was a stud wall pushed against the concrete, stuffed with fiberglass and covered in plastic. Building Science Corporation says that setup often leads to odor, mold, decay and corrosion.6 The Department of Energy's Building America program explains why. Fiberglass or cellulose touching a basement wall can absorb a lot of moisture and stay damp, and interior plastic traps it there.2
One homeowner on Green Building Advisor described exactly that old wall: framed against the concrete, batts, sheet plastic under drywall. "It didn't end well," they wrote. The rebuild put foam on the concrete and a 2x4 wall with unfaced batts in front of it.7
How much foam, and which kind
The wall still needs to dry toward the room. Building Science Corporation lists up to two inches of unfaced extruded polystyrene (XPS, R-10) or four inches of unfaced expanded polystyrene (EPS, R-15) as thin enough to allow that.6 Building America lists XPS, EPS and polyisocyanurate as usable on the inside of basement walls.2
Sources disagree on the details. Family Handyman's carpenter guide says to use XPS only.1 An expert member on Green Building Advisor argues against new XPS because of its blowing agents and prefers EPS or foil-faced polyiso. Another commenter there notes that foil-faced polyiso is vapor impermeable.7 Building Science Corporation's rigid foam detail calls for foam without foil or plastic facing so the wall can dry inward.6 We'd follow the Building Science Corporation detail. If your contractor proposes foil-faced board, ask how the wall will dry.
How the foam goes on
Use an adhesive made for foam, because regular construction adhesive can melt it. Family Handyman recommends vertical strips in the middle of each board, a continuous bead at the top and bottom, taped seams and caulk along the bottom edge.1 Building America adds that seams can be sealed with acrylic-latex caulk, foam sealant or mastic.2
Under the 2021 International Energy Conservation Code (IECC), section R402.2.8.1, basement wall insulation runs from the top of the wall down to 10 feet below grade or to the floor, whichever is less.3 Local adoption and amendments vary.
Seal and insulate the rim joist
The rim joist is the band of framing sitting on top of the foundation wall. It stays cold in summer and winter, which makes it a prime spot for condensation.6 Building America says rim joists must be air sealed and insulated.2 It's easiest before the wall goes up. Our basement insulation guide covers foam types and the rim joist in more depth.
What's the right order for framing a basement wall?
Lay out the wall about half an inch off the foam, build it a little short, then shim and nail it to the joists. Add blocking and drywall backers before any insulation or drywall goes in.1 The treated bottom plate sits on a capillary break, and the top of the wall gets fireblocked.
| Step | What happens | Why it matters |
|---|---|---|
| 1. Blocking | Blocks between joists where the joists run parallel to the wall1 | Gives the top plate something to nail into |
| 2. Layout | Line snapped 4 in. from the foam, leaving a 1/2 in. gap1 | Room for a foundation wall that isn't plumb or straight |
| 3. Plate | Treated bottom plate over a capillary break | Keeps wood out of water that wicks up through concrete |
| 4. Build short | Wall at least 1/4 in. shorter than the shortest floor-to-joist measurement1 | Forcing a tall wall can lift the joists and crack finishes upstairs |
| 5. Fasten | Adhesive plus a fastener every 6 ft and within 6 in. of each end1 | Holds the plate without heavy anchoring |
| 6. Plumb and shim | Plumb about every 4 ft, shim about every third joist, nail to every joist1 | A straight wall for drywall |
| 7. Close it up | Fireblocking at the top, drywall backers, then cavity insulation | Ready for inspection and drywall |
1. Add blocking where joists run parallel
When the floor joists above run parallel to your new wall, there's nothing to nail the top plate to. Blocking between the joists fixes that. Family Handyman suggests spacing the blocks 2 feet apart so they double as drywall backers, and using treated lumber if a block touches bare concrete.1 It's often easier to install before the foam and rim joist insulation go in.
2. Snap the layout line and leave the gap
Snap a line on the floor 4 inches out from the foam.1 That leaves about a half-inch gap between the new wall and the foam.1 The gap is there because foundation walls are rarely perfectly plumb or straight. It also keeps the studs off the foam, so the wall can go up straight even if the concrete isn't.
3. Put a capillary break under the treated plate
Concrete slabs wick moisture from the ground, so the bottom plate shouldn't sit bare on the slab.6 Many builders run a foam sill gasket under the treated plate as a simple break. On floors likely to get wet, a Green Building Advisor editor suggested going further. He'd keep all materials, even steel studs, off the floor with a subfloor panel system or dimple mat under the wall.7 Seal the foam's bottom edge to the slab so the insulation layer stays continuous.1
4. Build the wall short
Measure floor to joists in several spots and build the wall at least 1/4 inch shorter than the shortest measurement.1 If you need a sledgehammer to get it in, it's too tall. A forced wall can push the joists up and cause trouble with drywall joints and flooring in the rooms above.1 Sight each stud for its crown and point them all the same way, or the wall will come out wavy.1
5. Fasten the bottom plate
Family Handyman's carpenter uses construction adhesive plus a powder-actuated tool, with fasteners every 6 feet and within 6 inches of each end.1 Concrete screws work too. Powder-actuated tools are loud, so wear eye and hearing protection.1
6. Plumb, shim and nail the top plate
Plumb the wall about every 4 feet with a long level.1 Shims are needed only about every third joist, but nail the top plate to every joist.1 Where the floor is badly out of level or you're framing around a window, build the wall in place one stud at a time.1 Wood around a window set in concrete should be treated lumber if there's no room for foam under it.1
If your slab can move with the soil, your contractor may frame a floating wall instead. That's a wall hung from the joists with a slip joint at the bottom, so the slab can shift without pushing the floor above. Whether you need one depends on your soil and your building department, so ask.
7. Fireblock, add backers, then insulate
The gap behind the studs runs up into the floor framing above. Ask your contractor how they'll fireblock the top of the wall, because it's a common inspection item and the details are set locally. Then walk the whole room for drywall backers. The tops of outside corners, wall intersections and walls parallel to the joists are the usual gaps.1
The stud cavity gets unfaced fiberglass or damp-spray cellulose in front of the foam, with no plastic vapor barrier.6 When the drywall goes on, keep it at least half an inch off the floor.2
Should the bottom plate be pressure-treated?
Yes. Any wood that touches bare concrete should be pressure-treated.1 In a basement that means the bottom plate, blocking that rests on the foundation and wood around windows set in concrete with no foam under it. The studs and top plate stay dry above the slab, so regular framing lumber works there.
Concrete is never fully dry. Water from wet soil wicks through basement materials, and freshly placed concrete holds several thousand pounds of water that tries to dry inward.6 A plate sitting on that concrete gets damp from below, and untreated wood rots.
Treated lumber resists rot, but the plate still sits on damp concrete. That's why the treated plate goes on a capillary break, and why the water problem gets fixed before the wall goes up. Your local building code sets the exact rule for wood in contact with concrete, and your inspector will hold the job to it.
If your basement already has old walls framed on untreated plates against bare concrete, you're probably looking at a tear-out. That's a basement remodeling job, and it's worth opening up one section to see what's behind the drywall first.
Should basement walls be 2x4 or 2x6?
2x4 is the right call for most basement walls. Framed walls in front of the foundation usually carry no load, and the foam behind them can supply much of the code R-value. A 2x6 only earns its extra depth if you pick a cavity-only insulation route that needs thicker batts, or the wall has to hide plumbing.73
The numbers come from the 2021 IECC, Table R402.1.3. It sets a minimum basement wall R-value by climate zone, with several ways to meet it.3 Here is how that plays out in the markets Basement Remodeling Co. serves.
| Metro | County and IECC 2021 climate zone | Basement wall minimum (IECC 2021 Table R402.1.3) | A 2x4 assembly that meets it |
|---|---|---|---|
| Atlanta | Fulton, DeKalb, Cobb, Gwinnett: 3A4 | R-5 continuous, or R-13 cavity3 | 2 in. unfaced XPS (R-10) alone clears R-5 continuous6 |
| Denver | Denver, Jefferson, Arapahoe, Adams: 5B4 | R-15 continuous, or R-19 cavity, or R-13 cavity plus R-5 continuous3 | 2 in. unfaced XPS (R-10) plus R-13 in the stud cavity, or 4 in. unfaced EPS (R-15) with no cavity insulation required6 |
| Colorado Springs | El Paso: 5B4 | Same as Denver | Same as Denver |
| Fort Collins | Larimer: 5B4 | Same as Denver | Same as Denver |
Sources: climate zones from IECC 2021 Table R301.14; minimums from Table R402.1.33; foam R-values from Building Science Corporation.6 The "meets it" column is our own comparison of those figures. States and cities adopt code editions on their own schedule and amend them, so your building department has the final word.
When 2x4 is enough
In zone 3A, two inches of unfaced XPS on the concrete already exceeds the R-5 continuous option. The stud cavity insulation is a bonus. In zone 5B, the same R-10 foam covers the R-5 continuous half of the "R-13 cavity plus R-5 continuous" option, so the stud wall only has to hold R-13 of cavity insulation.36 The Green Building Advisor homeowner quoted above is in zone 5 and built a similar wall: 1 1/2 inches of foil-faced EPS glued to the concrete, then a 2x4 wall with unfaced batts.7
When 2x6 makes sense
The zone 5B table also allows R-19 in the cavity alone.3 That route needs a deeper cavity. But fiberglass still shouldn't touch the foundation, so foam goes behind the wall anyway.2 Once the foam is there, the R-13 plus R-5 route is usually the simpler path.3 Building America research did model a basement wall with 2 inches of XPS and 2x6 framing with fiberglass batts, so 2x6 isn't wrong.2 It's just more wall than most basements need.
The other good reason for 2x6 is a wall carrying drain lines or plumbing vents. That's a layout question for your contractor.
One detail to check on any quote: the IECC says insulation squeezed into a cavity thinner than its label thickness still has to deliver the required R-value.3 Ask which batt goes in the wall and what R-value it's rated at that depth.
If you're in Colorado, the basement finishing in Denver, Colorado Springs basement finishing and Fort Collins basement finishing pages cover local conditions. In Georgia, see basement finishing in Atlanta.
Do you need a permit to frame basement walls?
Plan on one. Finishing a basement with new walls usually runs through the local building department, and framing tends to arrive with wiring, ductwork and insulation that inspectors also check. The rules are set city by city and county by county, so confirm with yours before the first plate goes down. Our guide to basement finishing permits goes into more detail.
Energy code is one reason. The 2021 IECC, section R402.2.8, requires basement walls to be insulated to the table above. It exempts only unconditioned basements that meet six conditions, including having no HVAC supply or return diffusers serving the basement.3 A finished room with heat registers doesn't fit that list. Local adoption and amendments vary.
The practical order is simple. Your contractor pulls the permit and books the inspections, and nothing gets covered with drywall until the framing and insulation have been checked. New circuits belong to a licensed electrician.
Is framing a basement expensive?
No. Framing is one of the smaller line items in a basement finish. HomeGuide puts basement wall framing at $18 to $24 per linear foot, or about $2,300 to $3,500+ for a 1,000 sq ft basement with an open floor plan.5 The length of wall you build drives the number.
| Item | Published range | Unit |
|---|---|---|
| Framing basement walls | $18 to $245 | Per linear foot of wall |
| Framing, 1,000 sq ft basement, open plan | $2,300 to $3,500+5 | Total |
| Basement insulation | $1 to $55 | Per sq ft of wall or ceiling area |
| Basement insulation, 1,000 sq ft basement | $1,300 to $5,0005 | Total |
| Basement drywall | $1.50 to $3.505 | Per sq ft of wall surface, installed |
| Basement waterproofing | $6,000 to $18,0005 | Total |
All figures come from one national cost guide, HomeGuide, dated February 6, 2026. Treat them as national averages. Your contractor prices your house at the estimate.
Because framing is priced by the linear foot, count your walls. At HomeGuide's $18 to $24 a foot,5 150 linear feet of wall works out to about $2,700 to $3,600 and 200 linear feet to about $3,600 to $4,800, by our own arithmetic. Add partition walls for a bedroom, bathroom or storage room, and the count climbs.
For scale, a full basement finish costs far more than the framing. One Denver builder's 2026 cost guide puts a metro Denver finish at $30,000 to $90,000, and one Atlanta design-build firm publishes $45,000 to $80,000 for a typical full finish (both checked September 2026). The walls you can see are a small slice. The water fix, if you need one, can cost more than the framing and insulation together.
What should you ask your contractor about framing?
Ask how they'll handle moisture before they talk about studs. A good quote names the foam type and thickness against the concrete, the rim joist treatment, the plate material and what sits under it, the stud size, the cavity insulation and who books the framing and insulation inspections.
Questions worth asking at the estimate:
- What foam goes on the concrete, how thick, and is it faced or unfaced?
- How will you seal the foam seams and the rim joist?
- Is the bottom plate pressure-treated, and what goes under it?
- 2x4 or 2x6, and why for my house?
- What R-value is the cavity insulation at that stud depth?
- Is there any plastic vapor barrier in this wall? (The answer should be no.)
- How will you fireblock the top of the wall?
- Does my slab need a floating wall?
- Who pulls the permit, and which inspections happen before drywall?
Basement Remodeling Co. matches you with one vetted, licensed basement contractor for your area. You get a free on-site estimate and a written, itemized quote, and nothing starts until you sign. You can find a basement finishing contractor by ZIP code, or get a written quote for finishing your basement when you're ready.